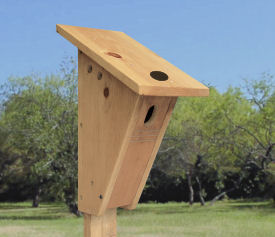
A collection of nestbox tips and techniques to help both you and the birds.
Have a nestbox tip you'd like to share? Just go to the Contact Us page and drop us a line. We'd love to hear your ideas.
Have a nestbox tip you'd like to share? Just go to the Contact Us page and drop us a line. We'd love to hear your ideas.

Tips and Techniques
Quick Bird Ladder
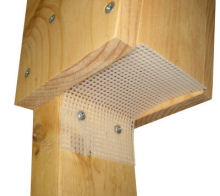
Some nestlings, especially Tree Swallows, need a little help climbing out of the box at fledging time. This is especially true if the inside of your nestbox is smooth.
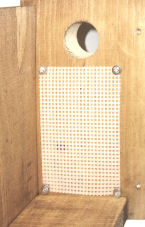
Scratches or saw kerfs beneath the entry will accomplish this, but cross stitch plastic grid makes a great substitute, and it's easily cut to size with scissors. Just attach it below the entry as shown with four 1/2" screws.
The Wasp Excluder
The deeply recessed floor of bottom pivot nestboxes are appealing to wasps. To prevent them from building their nest in this recess, cut a piece of cross stitch plastic grid and screw it to the back panel. By extending the plastic over the door, it does not interfere with opening and closing.
Cross stitch plastic grid is available at craft stores and in the craft department at most big box stores.
Soap the Roof
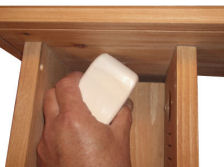
Nesting birds will usually avoid a nestbox with wasps inside. To prevent paper wasps from building their nests on the ceiling of your nestbox, rub on some bar soap. Ivory works great, but any bar soap will do. Wetting the soap slightly makes it easier to apply, or better yet, make a thick slurry of soap and water and apply with a brush.
Nesting birds will usually avoid a nestbox with wasps inside. To prevent paper wasps from building their nests on the ceiling of your nestbox, rub on some bar soap. Ivory works great, but any bar soap will do. Wetting the soap slightly makes it easier to apply, or better yet, make a thick slurry of soap and water and apply with a brush.
Latch Nail
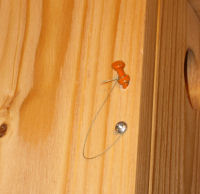
Painting the latch nail or pin a bright color will make it much easier to find of you accidentally drop it to the ground. If you want to prevent dropping it in the first place, tie on a piece of fishing line and secure the other end to the nestbox with a small screw. Keep the line as short as possible to keep birds from getting tangled.
Painting the latch nail or pin a bright color will make it much easier to find of you accidentally drop it to the ground. If you want to prevent dropping it in the first place, tie on a piece of fishing line and secure the other end to the nestbox with a small screw. Keep the line as short as possible to keep birds from getting tangled.
A Blade of Grass
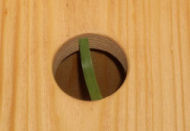
There are times when you need to determine whether a bird is using a nestbox. Wedge a piece of grass in the entry. If the bird returns to the box it will remove it before entering, giving you the evidence you need.
There are times when you need to determine whether a bird is using a nestbox. Wedge a piece of grass in the entry. If the bird returns to the box it will remove it before entering, giving you the evidence you need.
A 3/4" x 1 1/2" "drip rail" can be installed on the rear of the nestbox roof to help keep the box drier, especially on nestboxes with a pitched roof. The drip rail can serve as a mount for a sparrow spooker as well.
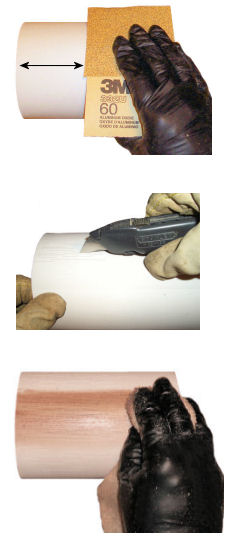
A little sanding and some stain can make PVC look like real wood, and at the same time camouflage its stark white appearance.
1. Sand PVC with 60 grit sandpaper. This removes the slick surface which is hard to stain, and creates small scratches that simulate woodgrain. Keep sanding strokes in same direction.
2. Wear heavy work gloves for this step! Using a utility knife or a sharp scribe, lightly cut a series of long and short lines. This will produce the deeper and darker woodgrain effects.
3. Using a rag, wipe on a small amount of stain - almost a "dry rub". When finished, allow the stain to dry for about half an hour, then wipe the surface with a clean rag.
Home | Site Map | Disclaimer | Contact Us
Copyright © 2012 NestboxBuilder.com
This site was last updated on 01/01/2016
Copyright © 2012 NestboxBuilder.com
This site was last updated on 01/01/2016
Attractor Spot
Cavity-nesting birds are attracted to holes which indicate to them a possible nesting cavity. Although the birds may eventually find your nestbox, you may speed up this process by adding an "attractor spot". It's best to make this spot removable, as you don't want to call attention to the nestbox once it's occupied.
To make one, apply strips of black electrical tape over a piece of wax paper, overlapping the strips so they'll stay together. Draw a circle about 1 1/2" in diameter on the tape, then remove it from the wax paper. Cut out the circle and apply to the nestbox.
Put up a second nestbox
Ever have a nesting pair investigate your nestbox and for some reason they decide to nest elsewhere? By putting up a second nestbox - preferably a different style, or with a differnt type entry - you will double the odds of providing a nestbox they prefer. If at all possible, place the boxes out of sight from each other - you may attract a second species to nest as well.
Screw Hook
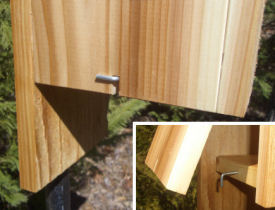
If you don't like using a nail as a door latch, replace it with a square-bend screw hook (available in several sizes at the big box stores). Simply twist the hook 90° and the door is free to open.
For top pivoting doors, saw a notch at the bottom of the door panel and screw the hook through this notch into the nestbox floor. If your nestbox has a bottom pivot door, screw the hook into the side panel and twist the screw hook over the door panel to secure it.
Increase the odds of attracting cavity-nesters
Uses for cross-stitch plastic grid
Another Trick for Wasps
Rear Drip Rail
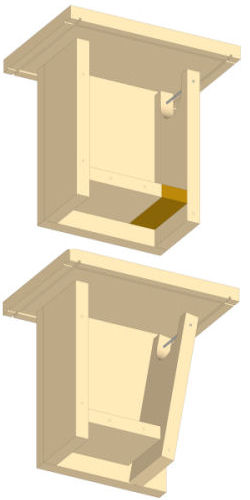
The floor space on a standard Gilwood is slightly under 15 square inches. If you'd like to increase this, here's two ways to do it:
1. Add a floor extension
Remove the door's pivot screws and latch nail (or pin). Move the door forward flush with the front of the nestbox. Measure the distance from the back of the door to the front edge of the existing floor - it should be between 1 1/4" to 1 1/2". Cut a 3/4" x 3 1/2" wide block by the distance you measured. Secure the block with a screw through each side into the floor extension. This will add approximately 5 square inches, making the total floor space around 19 square inches.
2. Angle the door forward at the top
You can add about 3 square inches to the Gilwood's functional nest area by angling the door forward at the top (the angle provides more space at the top of the nest). On older Gilwoods that use the entry wire as a pivot, measure and drill a new hole in the side. For newer Gilwoods that use a bottom pivot, just relocate the latch nail hole.
Note: either of these modifications will reduce the amount of roof overhang in the front (if the stock roof is used). We recommend adding 1" to the roof front to maintain adequate roof overhang.


Door Latches


Woodgrain Effect on PVC

Gilwood Nestbox Modifications

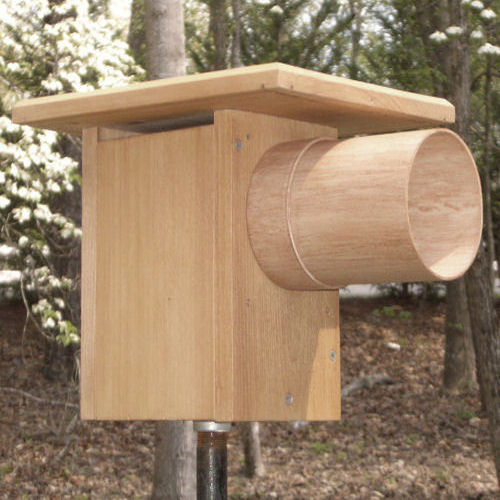
Above, a stained pvc nestbox. Below, a Hutchings raccoon guard stained to match the nestbox.
Heat Shield Material
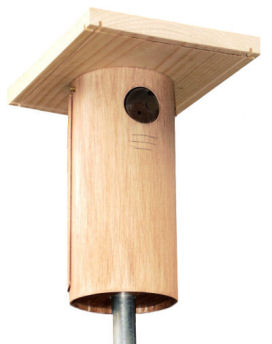
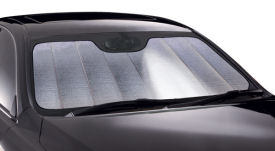
The sunscreens you often see behind the windshields of cars to keep the interior cool during the summer make excellent heat shields for nestboxes. They are inexpensive and easily cut with scissors.
The sunscreens you often see behind the windshields of cars to keep the interior cool during the summer make excellent heat shields for nestboxes. They are inexpensive and easily cut with scissors.
Submitted by Duane Rice, Clarksville, Tennessee

