The nestbox mounting system is equally as important, and perhaps even more so, than the nestbox itself. A proper mount provides a safer environment for nesting birds and is one of the best tools you have available for deterring climbing predators.
Mounting the nestbox on a tree trunk, a wooden post without a baffle, or on the side of a building transforms your nestbox into a fast food restaurant for raccoons, cats, and snakes.
The system of choice is the metal pole.
Mounting the nestbox on a tree trunk, a wooden post without a baffle, or on the side of a building transforms your nestbox into a fast food restaurant for raccoons, cats, and snakes.
The system of choice is the metal pole.


Mounting the Nestbox
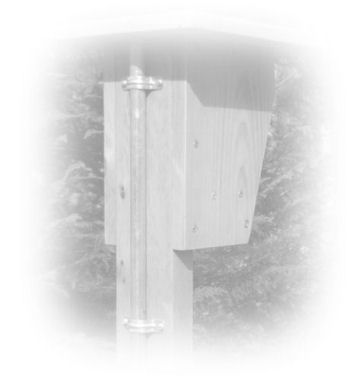
Mounting the nestbox to the pole
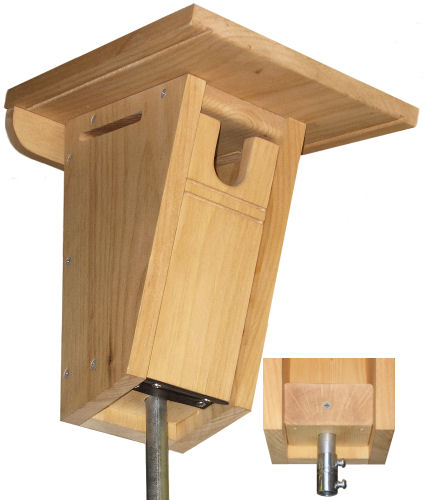
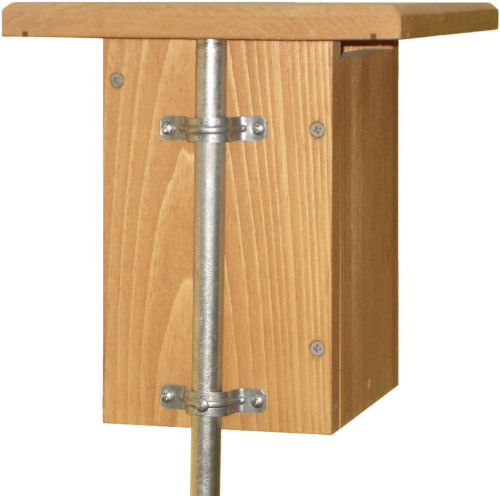
Back Mounts
(left click on images to enlarge)
(left click on images to enlarge)
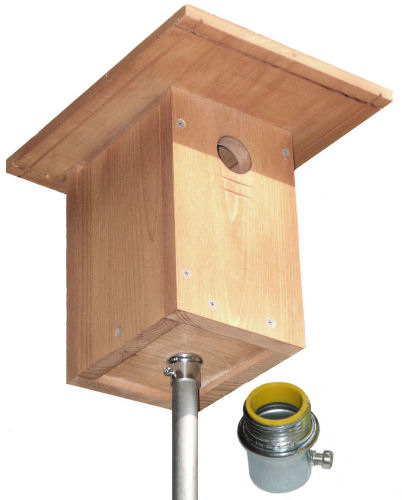
Bottom Mounts
(left click on images to enlarge)
(left click on images to enlarge)
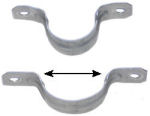
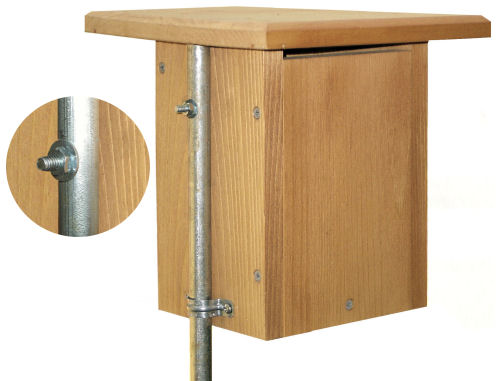
Twin Brackets
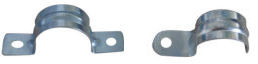
Install (2) EMT brackets with 3/4" pan head exterior wood screws. To prevent the box from rotating on the pole, drill a hole through one bracket and pole and secure with screw.
Right: EMT brackets are available in either two hole or one hole versions
Install (2) EMT brackets with 3/4" pan head exterior wood screws. To prevent the box from rotating on the pole, drill a hole through one bracket and pole and secure with screw.
Right: EMT brackets are available in either two hole or one hole versions
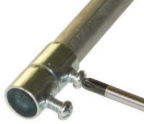
Bolt and Bracket
Drill a 5/16" hole through nestbox back and pole. Insert 1/4-20 x 2 1/2" machine screw and secure with washers and nut. Install bracket at bottom.
Drill a 5/16" hole through nestbox back and pole. Insert 1/4-20 x 2 1/2" machine screw and secure with washers and nut. Install bracket at bottom.
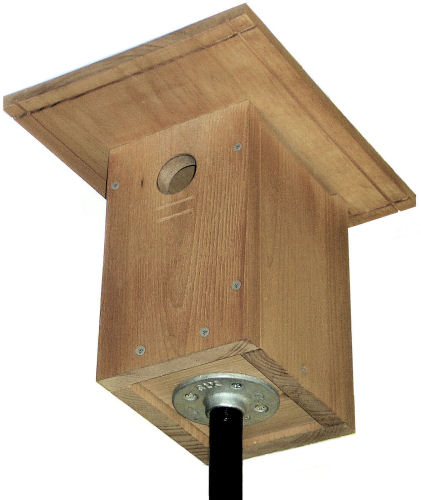
2x2 Pole Mounting Block
A 2x2 (1 1/2" x 1 1/2") is installed on the back of the nestbox (1 1/2" minimum rear roof overhang is required). A 3/4" hole is drilled into 2x2 to accept the 1/2" conduit. An EMT bracket is installed at the bottom. To prevent the box from rotating on the pole, drill a hole through both the bracket and pole and secure with screw.
A 2x2 (1 1/2" x 1 1/2") is installed on the back of the nestbox (1 1/2" minimum rear roof overhang is required). A 3/4" hole is drilled into 2x2 to accept the 1/2" conduit. An EMT bracket is installed at the bottom. To prevent the box from rotating on the pole, drill a hole through both the bracket and pole and secure with screw.
Springer Quick Mount
Designed by Gary Springer, this method uses an EMT set screw connector attached directly to a hole in the floor of the nestbox. The pole is inserted into this fitting and the screw tightened to secure the pole. For 3/4" conduit, drill a 1" diameter hole 5/8" deep into bottom of floor (for 1" conduit, drill a 1 1/4" hole). Screw the connector into the floor, then remove. Apply a small amount of water proof glue to the threads and reinstall the connector.
Designed by Gary Springer, this method uses an EMT set screw connector attached directly to a hole in the floor of the nestbox. The pole is inserted into this fitting and the screw tightened to secure the pole. For 3/4" conduit, drill a 1" diameter hole 5/8" deep into bottom of floor (for 1" conduit, drill a 1 1/4" hole). Screw the connector into the floor, then remove. Apply a small amount of water proof glue to the threads and reinstall the connector.
Floor Mounted Pole
For boxes with 1-1/2" thick floors, such as the Modified Gilwood (Bluebirds Across Nebraska) and the Little Pete (shown).
For 1/2" conduit, drill a 3/4" hole 1-1/4" deep into floor. Drill a pilot hole in the edge of the floor and secure pole with a #8 wood screw. For a quick mount/dismount system, install a short section of conduit into floor with an EMT coupling (inset).
Pipe Flange
Pipe flange accepts threaded 3/4" iron water pipe. At slightly less than 3 1/2" diameter, the flange will fit the bottoms of most boxes.
Flange is attached to floor with #10 exterior wood screws.
Pipe flange accepts threaded 3/4" iron water pipe. At slightly less than 3 1/2" diameter, the flange will fit the bottoms of most boxes.
Flange is attached to floor with #10 exterior wood screws.

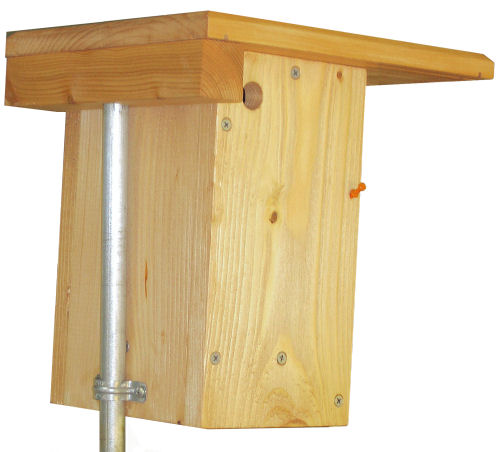
Back Mount
Bottom Mount
This system has become the standard for mounting light to medium weight nestboxes. When the conduit is polished with steel wool, coated with a quality paste wax and buffed smooth, the system is resistant to climbing predators; however, we recommend a baffle for added protection.
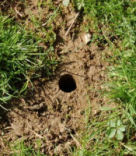
In this system the pole itself is driven into the ground, serving duty as both the mounting pole and anchor. Rather than standing on a ladder to drive in a ten foot pole, the conduit is cut into two sections (7'-3" and 2'-9"). The smaller section is used to create a starter hole and is then removed.
Iron water pipe works with this method as well. If you don't have the means to cut the conduit or pipe, retailers will be happy to cut it for you.
Climbing predators - especially raccoons, can easily climb 3/4" and 1" (inside diameter) conduit or pipe. We therefore recommend installing a stovepipe baffle. To stop ants, apply grease to the pole, underneath the baffle.


Use a hammer to drive rebar into ground. Leave approximately 24" above ground.
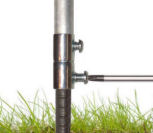
Attach 1/2" EMT coupler to end of conduit. Tighten upper screw against conduit. Install longer screw in bottom but do not tighten.
Slip conduit/coupler assembly over rebar. Tighten bottom screw against rebar.
Conduit
5 foot section 1/2" conduit (electrical metallic tubing, or EMT). Usually sold in 10 foot lengths. Most retailers will cut these to length for you.
Conduit coupler (with longer screw in bottom)
The bottom coupler screw is tightened against the rebar to prevent the conduit from rotating. Because the screws supplied with the coupler are too short to reach the smaller diameter rebar, the bottom screw must be replaced with a slightly longer screw.
Rebar
4 or 5 foot section 1/2" rebar. Use 4 foot for normal soils, 5 foot for loose or sandy soils.
The 1/2" conduit/rebar system is available in pdf form.
Download file: 170kb (pdf)
Step by Step


1
2
3
24"


Now give it a twist back and forth a few times while pulling it out of the ground. The dirt should remain inside the pipe, leaving you a nice starter hole as shown above.
Place the 7'-3" conduit section in the hole you just made, pushing it down as far as you can. You should now be able to reach the top of the pole without standing on a ladder. Finish driving the conduit to a height comfortable for monitoring.
Step by Step
Drive the 2'-9" piece of conduit about halfway into the ground.
From a ten foot section of conduit or pipe, cut two pieces: 7'-3" and 2'-9"
1
2
4
3

Height considerations
For eye level monitoring, the nestbox is typically installed approximately five feet from ground level to the bottom of the nestbox, adjusted of course for your height.
In certain situations, you may want the box installed higher than eye level. In public areas, for example, a nestbox installed above eye level may prevent the overly curious from being overly curious. Or you may need to solve a specific predator problem, such as a motivated cat who can easily make a vertical jump of five feet.
Safety Precautions
Insure that no underground utilities are present before you drive a pole or stake into the ground. You could be injured if the metal comes into contact with electrical cables, and you may be liable for any damages. Don't guess - know!
The following sections are step by step guides for two pole mounting techniques plus the common methods of attaching the nestbox to the pole.
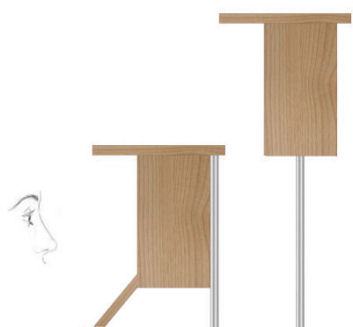
The following section shows some common methods of attaching the nestbox to the pole. There are two basic types: back mounts and bottom mounts.
An important consideration is how each of these methods will affect the finished nestbox height. For a given pole height, back mounts will place the nestbox lower than bottom mounts (see illustration at right).
The pole height above ground should be adjusted to provide the finished nestbox height you prefer.

Pole Types
Electrical metallic tubing (conduit) is available at most major home centers. Practical sizes for nestbox poles are 1/2", 3/4" and 1" (inside diameters). Conduit is usually sold in ten foot lengths, but it's easily cut to size with a hacksaw. Most stores will gladly cut it for you.
Cast iron water pipe in 3/4" (inside diameter) also makes a good mounting pole, but is more expensive than conduit. It's rough texture makes it more vulnerable to climbing predators so it must be baffled.
Some wild bird stores carry suitable poles along with ground stakes for securing them.
Soil type
Because poles must be anchored in the ground, either by using a stake or by driving the pole itself into the ground, your soil type will dictate how deep the pole or anchor must be. Loose or sandy soils will require this anchor to be set deeper than tightly packed soil.
1/2" Conduit/Rebar Mounting System
Designed by Steve Gilbertson, Aitkin, MN
Designed by Steve Gilbertson, Aitkin, MN
3/4" - 1" Conduit Mounting System
designed by Matt Storms
designed by Matt Storms
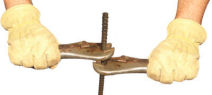
Rebar can rust into the ground and become difficult to remove. Use two vice grips and twist back and forth while pulling upward.
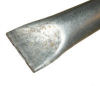
Flattening the end of conduit makes it easier to drive into the ground.
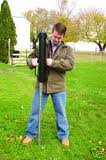
If you have many poles or stakes to drive, a pole pounder saves a lot of sweat.
Bending a two-hole conduit bracket outward produces a tighter fit on the pole.
Mounting Tips
Topics in this section
1/2" conduit mounting system
3/4" to 1" conduit mounting system
Box to pole mounting methods
Mounting tips
1/2" conduit mounting system
3/4" to 1" conduit mounting system
Box to pole mounting methods
Mounting tips

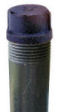
A cap installed on 3/4" iron water pipe will protect the threads while driving the pipe into the ground.
Have a mounting tip that you'd like to share? We'd love to hear from you!
Home | Site Map | Disclaimer | Contact Us
Copyright © 2012 NestboxBuilder.com
This site was last updated on 01/01/2016
Copyright © 2012 NestboxBuilder.com
This site was last updated on 01/01/2016
This concludes our basic tutorial series. If you would like to continue to the Building a Nestbox tutorials, click on the link below: